The Christkind's - Optimization of the Supply Chain

Story
After the smooth success of the app, the Christkind’s imagination began to soar. What if the app could also handle perfect packaging for delivery?
The idea was simple yet transformative: ensure all parcels for a household are packed together in one transport box. This way, a single pick would suffice, avoiding second deliveries or the hassle of searching for packages scattered in front of houses.
To bring this vision to life, the Christkind sketched rectangles on a virtual ground plan, each representing a household. Once all parcels for a household were ready, they’d be assigned to a transport box. Each box would be labeled with a QR code containing a unique identifier. The app then connected the household to the corresponding container number, ensuring every transport box was linked to its rightful destination.
But the Christkind didn’t stop there. Why not use the PowerApp to manage the storage process as well? The app would feature a QR code scanner, allowing helpers to scan each transport box as it was prepared. Upon scanning, the system would automatically assign the box to a specific storage location, recording its exact position. This would make retrieval simple and efficient, eliminating confusion in the storage area.
With this innovative extension, the Christkind envisions a fully streamlined delivery process—from packing to storage to final delivery. Every detail, from household assignments to storage logistics, is handled with care, ensuring joy reaches every home with precision and efficiency!
Implentation
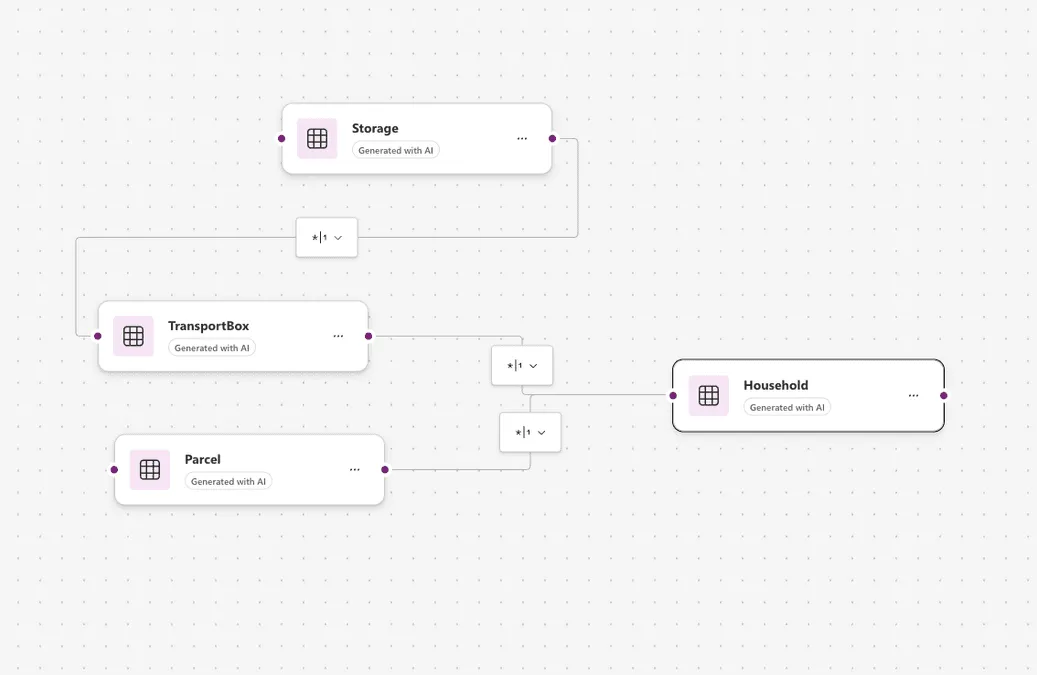
Here’s a simple data model for the Christkind’s PowerApp with QR code and storage system functionality:
Entities and Fields
Household
- HouseholdID (Primary Key, GUID): Unique identifier for the household.
- HouseholdName (String): Name of the household.
- Address (String): Delivery address.
- TotalParcels (Number): Number of parcels for the household.
- Status (Choice): Status of the household parcels (e.g., Pending, Packed, Delivered).
Parcel
- ParcelID (Primary Key, GUID): Unique identifier for the parcel.
- HouseholdID (Foreign Key, GUID): Links to the associated Household.
- ContentDescription (String): Description of the parcel content.
- Weight (Number): Weight of the parcel (optional).
- PackedStatus (Choice): Status of the parcel (e.g., Pending, In Box).
TransportBox
- BoxID (Primary Key, GUID): Unique identifier for the transport box.
- BoxLabel (String): QR code label for the box.
- HouseholdID (Foreign Key, GUID): Links the box to a household.
- StorageLocation (String): Location in the storage area where the box is placed.
- PackedStatus (Choice): Status of the box (e.g., In Progress, Completed).
Storage
- StorageID (Primary Key, GUID): Unique identifier for the storage space.
- LocationName (String): Name of the storage location (e.g., Shelf A, Row 2).
- Capacity (Number): Maximum number of boxes the location can hold.
- CurrentOccupancy (Number): Number of boxes currently stored.
- Status (Choice): Availability status (e.g., Available, Full).
Relationships
- Household - Parcel: One household can have multiple parcels.
- Household - TransportBox: One household corresponds to one transport box.
- TransportBox - Storage: One transport box is assigned to one storage location.
Creating the App
Here are detailed instructions for setting up and integrating a QR scanner into a model-driven app with a custom page:
Add Tables to Your Solution
Add all necessary tables (e.g., Households, Transport Boxes, Storage Locations).
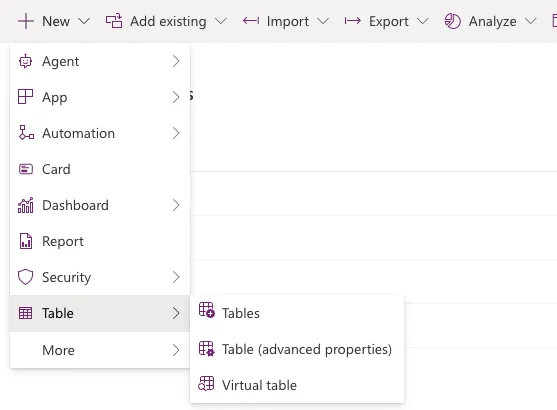
Start Creating a Model-Driven App
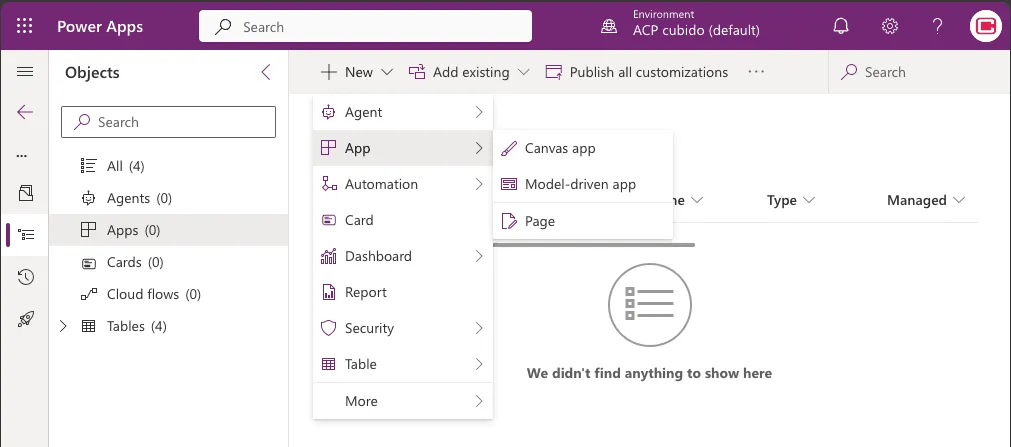
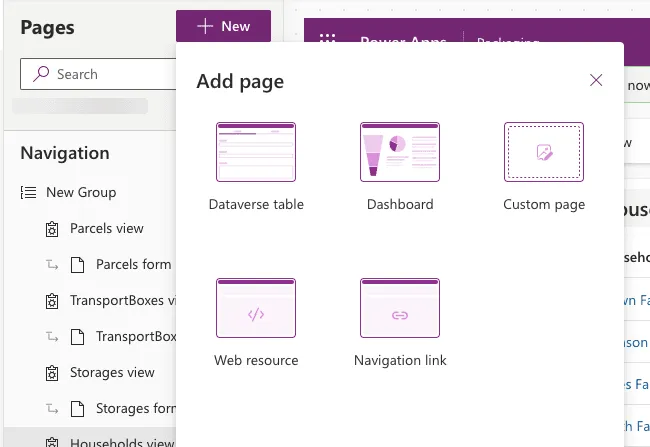
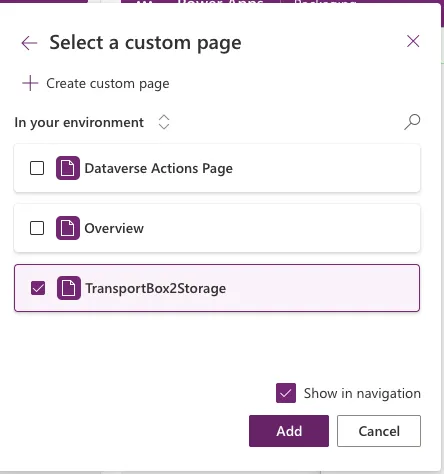
Add a Custom Page for QR Scanning To enable scanning functionality, you’ll need a custom page (Canvas App)
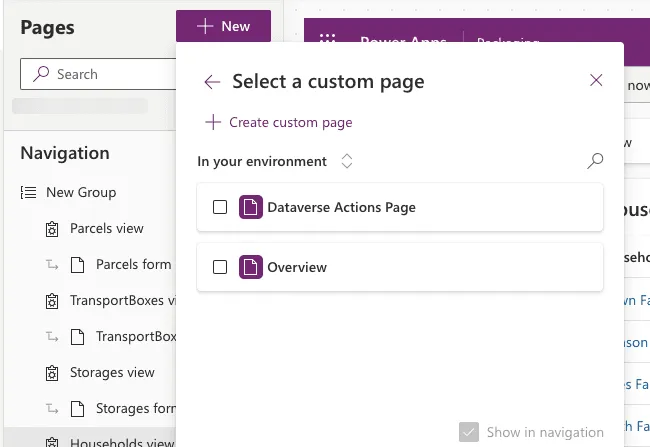
Select Custom Page
Create Custom Page
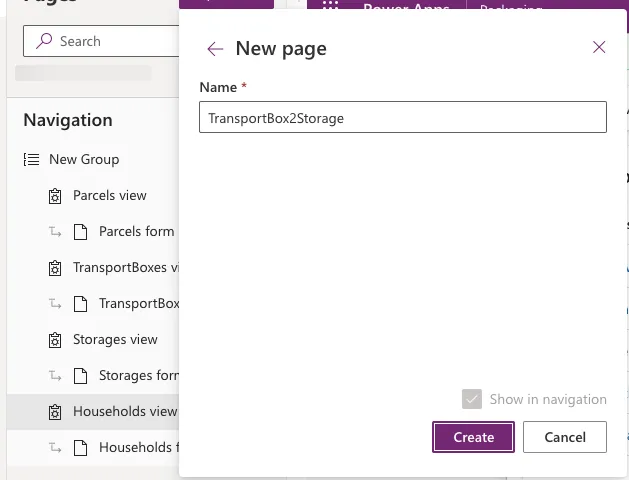
Give a Name
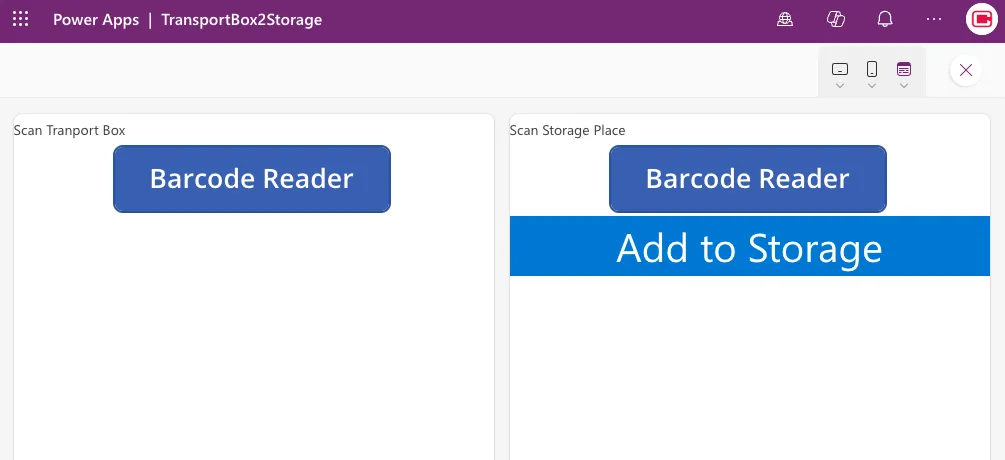
Build the QR Scanner Custom Page
- In the Canvas App editor, design the layout:
- Add two scan input areas (e.g., for Transport Box ID and Storage Location).
- Include a large button labeled “Save” to record the transport box to a specific storage location.
- Bind the input fields and button actions to your data tables.
- Test the app to ensure that QR codes are being correctly scanned and data is updated in the tables.
- Publish the App. Once the custom page is finalized, PUBLISH your changes.
- Remember: Without publishing, your app changes won’t be live.
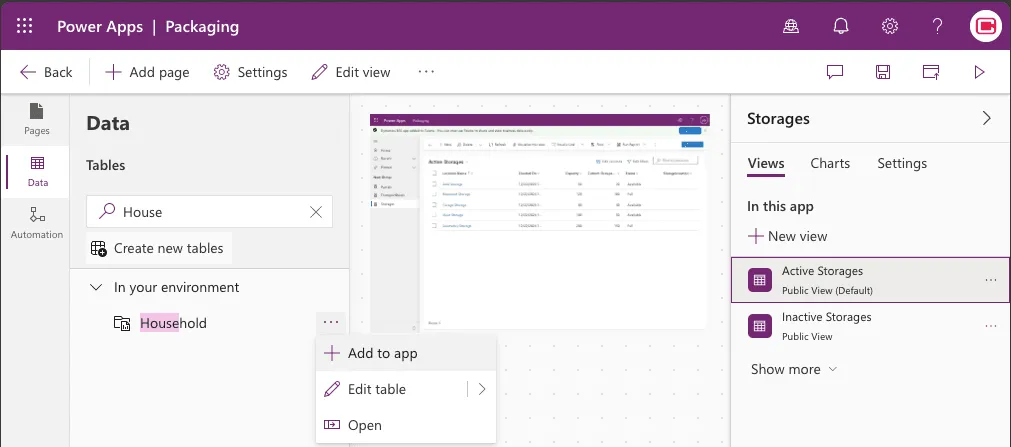
Integrate the Custom Page into Your Model-Driven App
Remark
These requirements are ideally suited for a Model-Driven App in PowerApps. Any functionality that cannot be achieved with the Model-Driven App can be implemented using a Canvas App.
Links
- 1: The Challenge of the Letters
- 2: The Christkind’s Data Transformation - Transforming Letters into Forms
- 3: The Christkind’s Magical Email Solution
- 4: The Christkind’s Magical PWA - Transforming Children’s Letters into Digital Art
- 5: The Christkind’s Ingenious Snail Mail Solution - Bringing Letters to Life
- 6: The Christkind’s Ingenious Snail Mail Solution - Embracing the Flow
- 7: The Christkind’s Ingenious Snail Mail Solution - To the next level
- 8: The Christkind’s - Deployment Dilemma
- 9: The Christkind’s - Spreading the Christmas Spirit
- 10: The Christkind’s - Upgrading the Production Line PowerApps
- 11: The Christkind’s - Upgrading the Production Line Excel
- 12: The Christkind’s - The Christkind’s - Documenting the Christkind’s Journey
- 13 - The Christkind’s - The preparation for the call with Santa
- 14 - The Christkind’s - The Meeting with Santa
- 15 - The Christkind’s - Enhancing Knowledge Access with Graph Connectors
- 16 - The Christkind’s - Fine-Tuning the Graph Connector for Better Copilot Answers
- 17 - The Christkind’s - Building a Custom Agent with Copilot Studio
- 18 - The Christkind’s Building a Custom Bot with VSCode
- 19 - The Christkind’s - The Christkind’s - A Surprising Discovery Copilot and the Bot
- 20 - The Christkind’s - The Christkind’s - Discovering the Magic of Github Copilot
- 21 - The Christkind’s - Optimization of Delivery with a Custom Control