The Christkind's Magical PWA - Transforming Children's Letters into Digital Art

Story
As the Christkind reflected on the email communication method, it began to wonder if it was truly the best solution for reaching young children. “What about the little ones in kindergarten?” it thought, scratching its head in frustration. “Many of them can’t write letters yet!”
Feeling a wave of annoyance at itself for not considering this sooner, the Christkind began to brainstorm new ideas. “What if I created a Progressive Web App (PWA) that parents could install on their phones?” it exclaimed, excitement bubbling up once more. “This way, parents could easily capture their children’s drawings and submit images directly to me!”
The thought of such a magical solution filled the Christkind with joy. “Imagine the delightful art that children could share! Each drawing would be a window into their hearts, full of imagination and creativity.”
With a renewed sense of purpose, the Christkind began to sketch out how this PWA would work:
User-Friendly Interface
“I’ll make sure the app has a bright and cheerful design, inviting parents to submit their child’s artwork easily. A simple button to take a photo will make it effortless!”
Image Submission
“Parents can take a quick picture of their child’s drawing, and the app will allow them to submit it directly to my shared mailbox. This means no more worries about lost letters!”
Instant Confirmation
“After submitting the drawing, parents will receive an instant confirmation that their child’s artwork has reached me. They’ll feel the holiday magic, knowing their little one’s creation is in good hands.”
Encouraging Creativity
“I’ll also include prompts and suggestions for parents to encourage their children to express their wishes through art. After all, every picture tells a story!”
The Christkind smiled, imagining the joyful expressions on children’s faces as their drawings made their way. “This will not only make it easier for parents but also provide a fun way for children to participate in the holiday spirit!”
With a renewed sense of direction, the Christkind felt the thrill of innovation course through its magical being. “How could I have overlooked this?” it chuckled softly. “But now, I have a brilliant idea that will bring the magic of Christmas to life like never before!”
Solution
The Christkind was thrilled with the concept of the Progressive Web App and immediately began outlining the technical solution. “This is going to be a game changer for gathering children’s wishes!” it exclaimed.
The PWA would be built using React, a powerful JavaScript library that would make the app both responsive and user-friendly. The Christkind envisioned the key features of the app:
Photo Upload Button
At the heart of the app would be a photo upload button, allowing parents to easily take a picture of their child’s artwork and submit it. “It must be intuitive and inviting,” the Christkind thought, picturing parents effortlessly sharing their children’s creativity.
Azure Function for Image Storage
Upon submission, an Azure Function would be triggered to handle the image upload. This function would securely store the uploaded image in Azure Blob Storage, ensuring that each precious drawing is saved in a safe and organized manner. “Every artwork deserves a special place in the cloud!” the Christkind declared.
Storing Text Input Data
Alongside the image, any text input provided by the parents—like the child’s name, age, and a brief description of the drawing—would be stored in an Azure Table. “This way, I can keep track of all the important details about each wish,” the Christkind noted, feeling pleased with the organization.
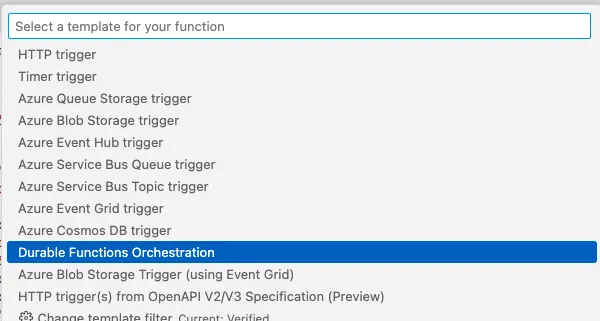
Durable Function for Image Processing
Once the upload is complete, the Christkind knew that the magic truly began. A Durable Function would be called, which would submit the image file to the Azure OpenAI API. “This will allow the AI to analyze the drawing and generate a delightful description of what the child has created!” it exclaimed with excitement.
Storing the AI Output in Dataverse
The output from the OpenAI API—now a beautiful description of the drawing—would then be stored in Dataverse, connecting the child’s artwork with its narrative. “This will create a wonderful memory for every child, where their art comes to life through words!” the Christkind beamed, imagining how each description would add to the magic of the season.
With the technical blueprint in place, the Christkind felt a rush of inspiration. “This solution will not only simplify the process but also enhance the way children engage with their wishes!” it thought, eager to bring this vision to life.
You can find all the code for this project at: GitHub Repository: BlogPosts_petkir Folder: christkind-pwa
Setting Up the PWA with React (TypeScript)
Use Create React App to bootstrap the application with TypeScript.
npx create-react-app christkind-pwa --template typescript
cd christkind-pwa
Install libraries for handling uploads, routing, and any UI components.
npm install axios react-router-domBuilding the Photo Upload Interface (TypeScript)
Create a component (Upload.tsx) with a form that includes a file input for images and a button to submit.
import React, { useState, ChangeEvent, FormEvent } from 'react';
import axios from 'axios';

const Upload: React.FC = () => {
    const [image, setImage] = useState<File | null>(null);
    const [description, setDescription] = useState<string>("");

    const handleImageChange = (event: ChangeEvent<HTMLInputElement>) => {
        if (event.target.files) {
            setImage(event.target.files[0]);
        }
    };

    const handleSubmit = async (event: FormEvent<HTMLFormElement>) => {
        event.preventDefault();
        if (!image) return;

        const formData = new FormData();
        formData.append('image', image);
        formData.append('description', description);

        try {
            const response = await axios.post('YOUR_AZURE_FUNCTION_URL', formData, {
                headers: {
                    'Content-Type': 'multipart/form-data',
                },
            });
            console.log(response.data);
        } catch (error) {
            console.error('Error uploading image:', error);
        }
    };

    return (
        <form onSubmit={handleSubmit}>
            <input type="file" onChange={handleImageChange} required />
            <input
                type="text"
                placeholder="Add a description..."
                value={description}
                onChange={(e) => setDescription(e.target.value)}
            />
            <button type="submit">Upload Drawing</button>
        </form>
    );
};

export default Upload;
Image Processing
As we know that we need a backend and the Frontend with an Azure Static website we can easly initialize this also. i prefere to use devdependencies insallation into the current project not global
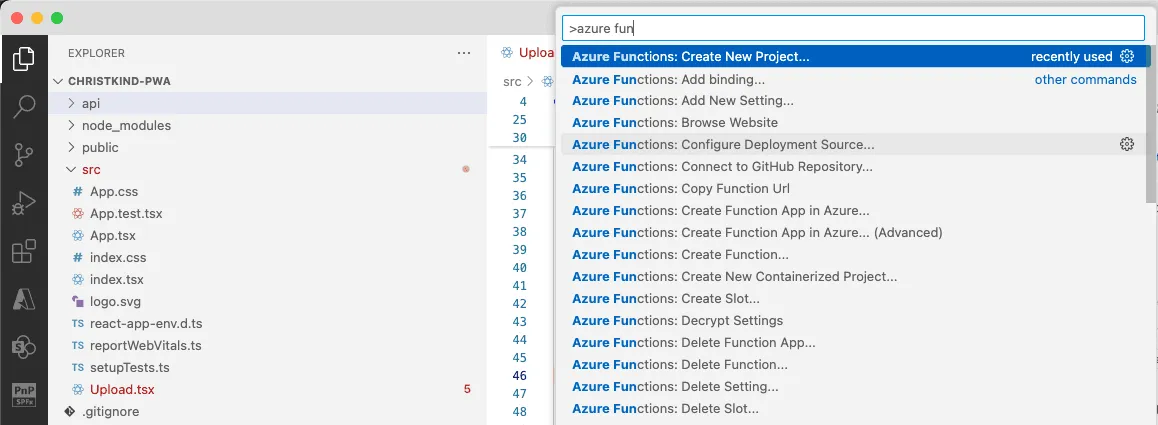
npm install -D @azure/static-web-apps-cliCreate a folder named api and add an Azure Function in C# within it.
 The Christkind decided to use .NET 8 for the Azure Function due to its Long-Term Support (LTS), ensuring stability and extended support over time. Although .NET 9 is the latest version, it is only a Short-Term Support (STS) release.
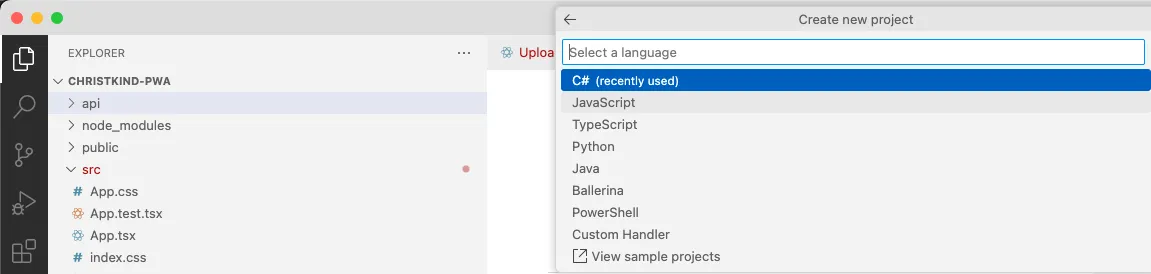
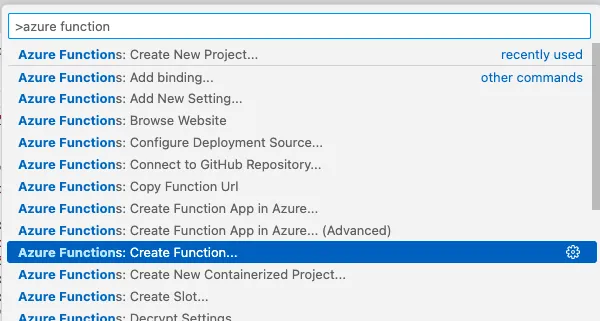
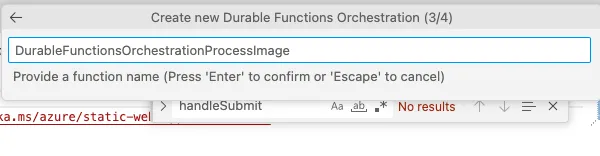
Create an HTTP-triggered function (UploadImageFunction) to handle the image upload.

Next, the Christkind will set up an Azure Static Web App to manage both the frontend and backend seamlessly with this service.
npm install -D @azure/static-web-apps-cliInitialize the Static Web App with the following command:
npx swa initWelcome to Azure Static Web Apps CLI (2.0.1)
✔ Choose a configuration name: … christkind-pwa
Detected configuration for your app:
- Framework(s): React, with API: .NET, .NET
- App location: .
- Output location: build
- API location: api
- API language: dotnetisolated
- API version: 8.0
- Data API location:
- App build command: npm run build
- API build command: dotnet publish -c Release
- App dev server command: npm start
- App dev server URL: http://localhost:3000
- API dev server URL: http://localhost:7071Mainly the autodetection is right, if not you get a wizzard in the commandline
✔ Are these settings correct? … no
✔ What's your app location? … .
✔ What's your build output location? … build
✔ What's your API location? (optional) … api
✔ What's your API language? (optional) › Dotnet isolated
✔ What's your API version? (optional) › 8.0
✔ What's your data API location? (optional) … api
✔ What command do you use to build your app? (optional) … npm run build
✔ What command do you use to build your API? (optional) … dotnet publish -c Release
✔ What command do you use to run your app for development? (optional) … npm start
✔ What's your app development server URL (optional) … http://localhost:3000
✔ What's your API development server URL (optional) … http://localhost:7071
Everything is written down into the swa-cli.config.json if you need changes change it there
- Use
swa startto run your app locally. - Use
swa buildto build your app. - Use
swa deployto deploy your app to Azure. or make this with a pipeline
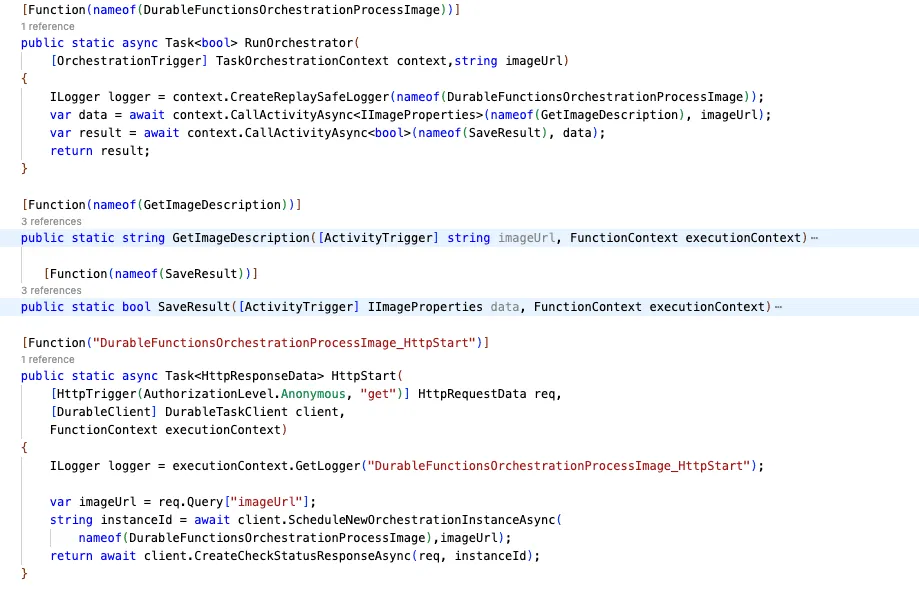
Once the image is uploaded, process it using the Azure OpenAI API to generate a description.
To handle this, we will use a Durable Azure Function, as the processing time can be unpredictable and may take longer.

Store this description along with the image metadata in Dataverse to maintain a comprehensive wish list.
Here is a screenshot of the process. It doesn’t look complicated, does it?
Deploying the Application
I recommend using a pipeline based on Azure DevOps or GitHub Actions for deployment.
- In Azure DevOps, you can create a pipeline with the task
AzureStaticWebApp@0to build and deploy your application. - In GitHub Actions, you can use the
Azure/static-web-apps-deploy@v1action to automate the deployment process.
For more details, please refer to the GitHub repository where you can find additional information and examples.
GitHub Repository: BlogPosts_petkir Folder: christkind-pwa
Remark
Please note that HTTP requests exceeding 4 minutes are not supported in Azure.